Saturday, June 15, 2013

How It's Made

June is jumpin', but I'm working hard to keep up.  Of course the exhibit at the museum continues through the summer.  I went up yesterday to meet my cousin and her friend who came down from Calhoun to see the show.  We had a nice lunch and visit.

The Columbus Artists' Guild show is in full swing.  It opened June 8th and continues through the 22nd at the Illges Gallery at Columbus State University.  My piece didn't get any awards this year, but it's nice to have work in an art show. 

The East Cobb Quilt Guild show is going on through Sunday.  I entered two pieces and received an Honorable Mention for one of them ("Black Hills September").  My friend, Linda and I, along with our husbands (can you believe that?) will go up tomorrow afternoon, see the show, and bring our quilts home. 

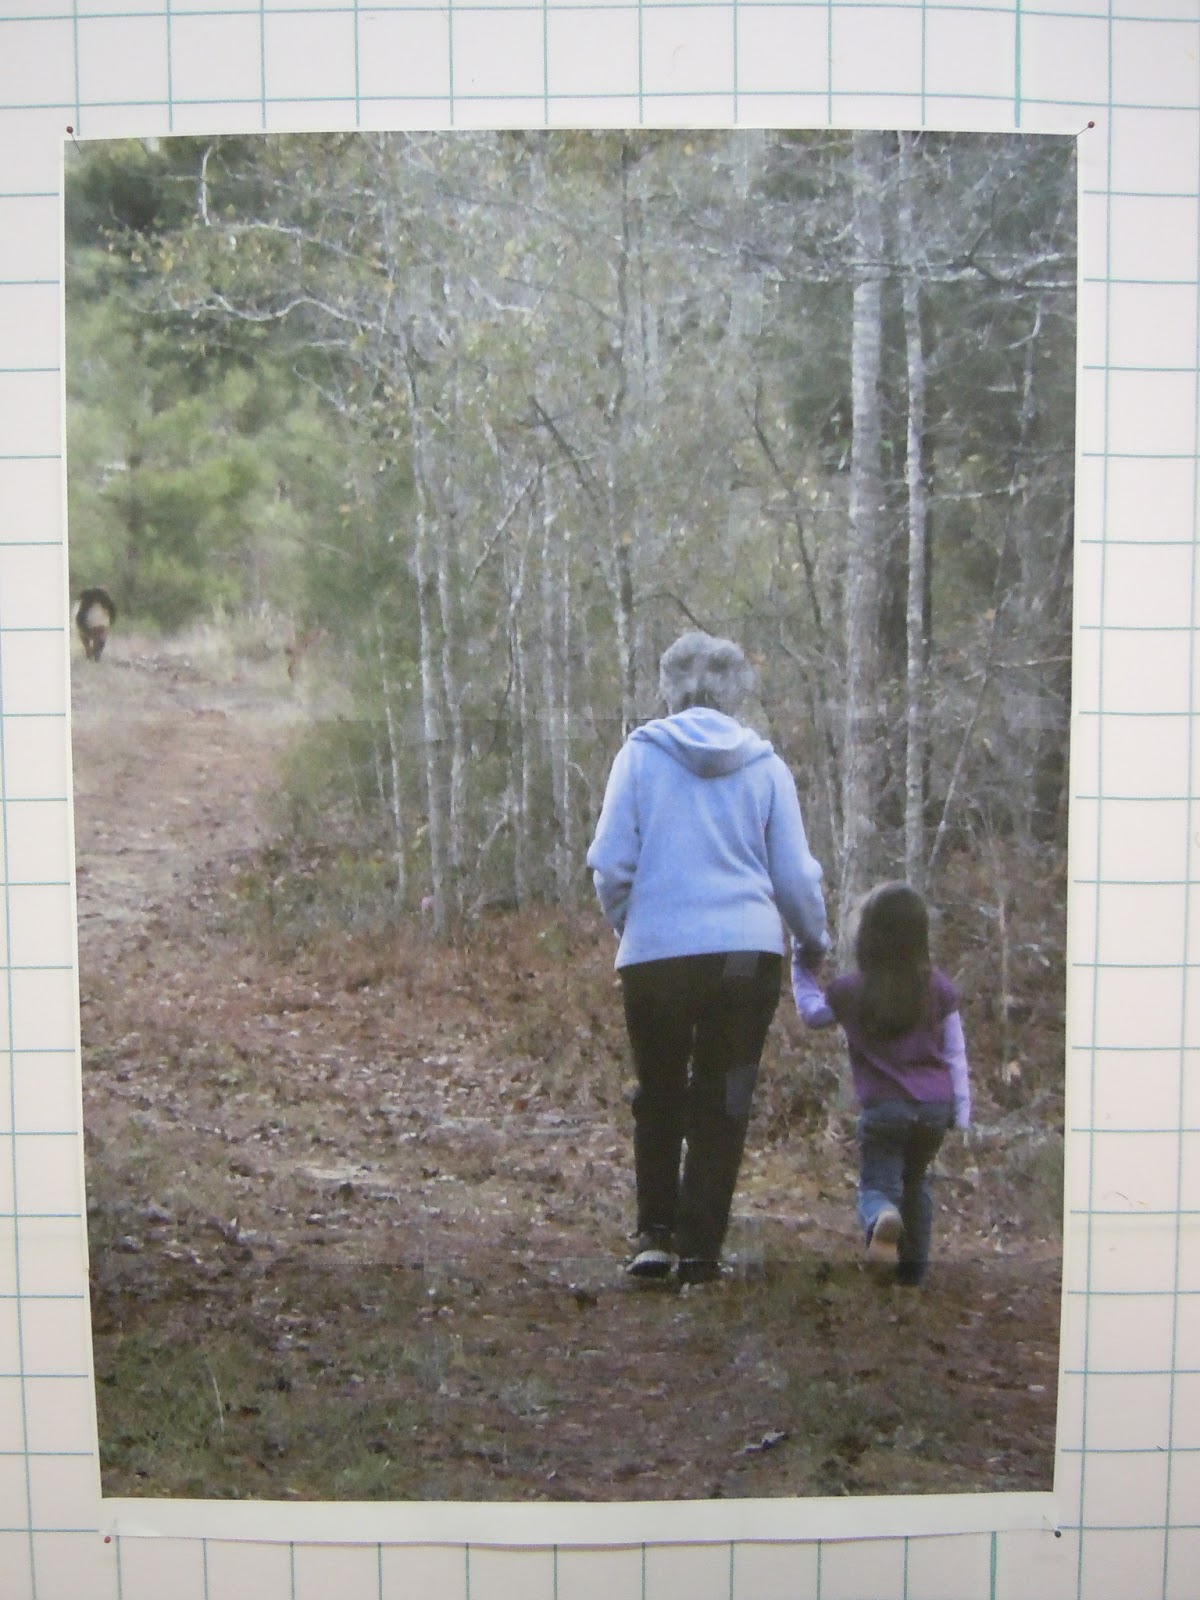
I made two new pieces for the museum exhibit.  I put the photos that I worked from in my May 5th post.  Here is one of the finished pieces.


It's called "Best Friends Forever" and is based on a photo by Robin Camp.  This is me and my youngest granddaughter, Sarah.  Does this quilt make my butt look big?

I used the technique I've used before with the trees and background where I cut up zillions of tiny pieces of fabric and place them, piece by piece.  I took pictures as I was working on this one, so I thought I'd give you a glimpse into the mind of a very disturbed individual. 
This is the original photo that I was working with.  I cropped it, enlarged it and printed it on my printer, then taped the pages together.  It's about 30 x 32 inches.
Next, I did a line drawing of the main elements.  Sorry, it doesn't show up very well in the photo.

The next step is to draw a rough outline on a piece of muslin of where the colors change.  This will be the base of the quilt.  I write the value (light, medium, dark) and color of each area on the muslin.  Then, the fun part begins.  I choose fabrics from among my mountain of scraps.  Prints work fine, but stripes or plaids are not so good.  I iron a fusible (I use Lite Steam-a-Seam II) to the back of the fabrics.  I then peel the backing paper off the back side (this is VERY important--peel before you cut) and begin cutting the fabrics into small, odd-shaped and varying pieces.  The pieces are usually no larger than a dime--some are smaller. 

I use 4 or 5 different fabrics for each value.  The values might be light light green, light green, light medium green, medium green, dark medium green, dark green, and dark dark green.  So, you'll have 4 or 5 fabrics of all those values.  You get the idea. I find paper plates to be useful in keeping the different values separate.

Now the really crazy part.  I place the pieces on the muslin one at a time with a pair of tweezers.  I try not to put pieces of the same fabrics next to each other--that's why it's good to have 4 or 5 different fabrics for each value.  Even though it's very tedious, it gives you a great depth of color.

 You can see the effect here of all the bits.  I usually iron the pieces down a little as I go because they can't be trusted to stay in place on their own.  In a pinch, you can still pull them off if you need to, or you can cover them with more bits if an area just doesn't look like you want it to.  You don't want to have too many layers, but this is a pretty forgiving technique, so you can usually fix most mistakes. 

After the bits are in place, but before the tree trunks are put down, I put a layer or two of tulle over the bits and stitch with some invisible thread just to hold everything down.  In this case, I used two layers of gray tulle over the area above the road because I wanted the colors to be more muted to help add to the illusion of depth.  You can still put some bits on top of the tulle if you need to, but you need to always use a press cloth if you're ironing over the tulle--otherwise, it melts.
A little closer view.

I used some larger pieces in the road, then put small bits down for fallen leaves. 
I "built" the figures on a teflon sheet and fused them together.  They are put together in a more conventional way. 


The figures are placed on the background and I'm ready for thread work.  At this time, I iron a piece of stabilizer to the back of the piece to help keep it from distorting when I do the thread work and quilting.  I want to make sure I stitch through any of the bits that are not covered by tulle.


   I use a small zigzag stitch and a matching lightweight thread (Superior Bottom Line) to go over all the raw edges (not the bits, but all the larger pieces in the road and the figures).  I do some thread painting to highlight (example-hair and tree trunks).


A detail shot of the tree trunks and leaves.

Now it's ready to be layered with batting and backing and quilted.  Then, I'll square it up and either face it or bind it.  I like to face the edges because it looks more like a piece of art that way, so I'm doing that more and more.  I'm also leaving off borders for the same reason.

I didn't take as many photos as I should have to illustrate this technique, but I hope you can follow along.  It's not a method that a lot of people would want to do, but I like it and it's actually kind of relaxing to play with all the tiny bits.  


Tuesday, June 4, 2013

"As I See It"

The long-anticipated opening of my solo exhibit at the Southeastern Quilt & Textile Museum finally arrived last Saturday.  It was awesome on so many levels.  First of all, people actually came to see my work.  We had 70+ people to sign the guestbook and there was a steady stream of visitors all day.  I was there from 10 a.m. til 4 p.m.

Family included both my sisters-in-law, two nieces, and 3 great nieces.  Friends from Fayetteville, Columbus, Athens, and Atlanta made the journey to add their support and lots of people from the Carrollton area. 
L to R:  Marybeth Tawfik, JoAnn, and Paula Tanner.  These ladies are part of the SAQA GA/SC Regional group.  Thanks to both of them for their support.
The lady on the left is Joann Dunn, who's with the local writers' group.  I'll be doing an artists' talk for them in July at the museum.  I'm really looking forward to that.


I was very happy with the space and the way I was able to display everything.  I had worried that there wouldn't be enough art to cover the walls, but it worked out perfectly. 

I'm so grateful to the museum and to everyone who helped and everyone who came to see my work.  I hope people will continue to enjoy it, as it will hang through the summer until August 31st.

If you need info on hours or directions to the museum, just check out the website at   www.southeasternquiltmuseum.com